With the release of VMware App Volumes 2.15, you now have a profile_only template available for writable volumes.
As the name suggests this template will only capture the user profile. Using this type of writable volume is something you definitely should look into when you are not using a User Environment Management solution and/or you’re struggling with things like roaming profiles or folder redirection.
Just like every type of profile management solution you need to fine tune it, so editing the snapvol.cfg is a must.
In this blog I will explain how you can do this. This way, you are in control of the files and folders that are written on the writable volumes and prevent the volumes from becoming to large and claim a lot of unnecessary storage space.
What is this snapvol.cfg?
The snapvol.cfg configuration file is located in the root folder of each individual writable volume. This file contains information such as what should be captured and not captured on the writable volume.
The snapvol.cfg file contains not only paths to folders in the user’s C: drive, but also registry locations to capture (or not to capture), file types in a given path, specific process names, and so on.
This configuration file allows you to customize writable volumes to suit business needs and with the release of App Volumes 2.15, VMware added some new features to customize this file by using two new environment variables, %USERNAME% and %USERPROFILE%.
How to edit the snapvol.cfg
Before you can edit the snapvol.cfg, make sure you have a virtual machine available without the App Volumes Agent installed. Follow the steps below to edit the profile_only template.
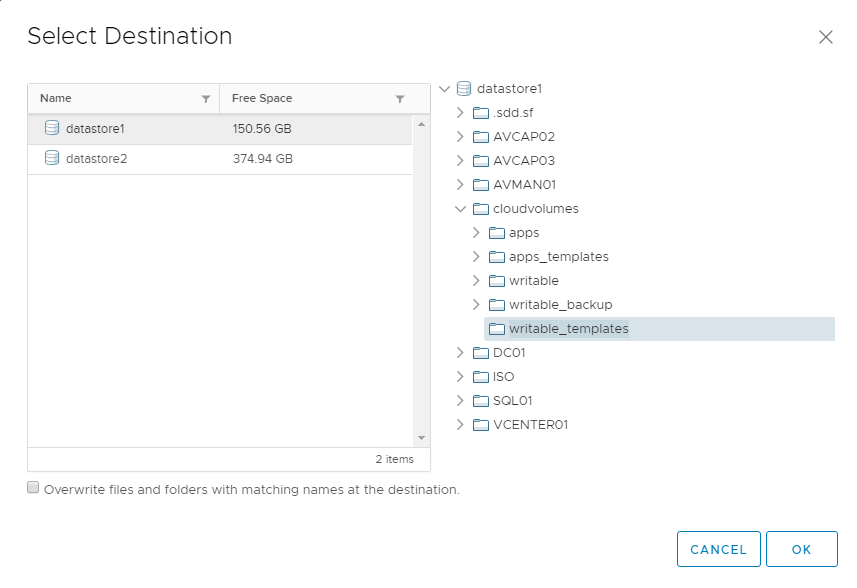
- Login to vCenter and browse the datastore.
- Copy the template_profile_only.vmdk to a folder, for example “cloudvolumes”.

- Rename the template, in my case I renamed it to
template_profile_only_v2.vmdk. - In vCenter go to VM’s and Templates and select the virtual machine without an App Volumes Agent installed.
- Edit the VM settings.
- Add an existing hard disk and browse to the location where you copied the new template.

- Click OK to reconfigure the VM.
- Login the VM and start the Device Manager and select Disk Management.
- Right click on the new disk and select Online. (If needed assign a drive letter to the disk).

- Open a windows explorer and browse to the new disk.
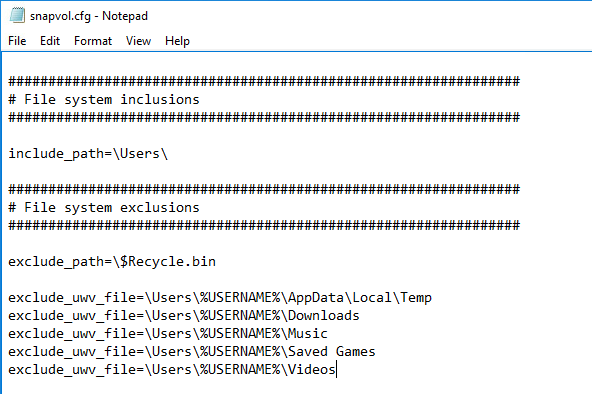
- locate the snapvol.cfg and open it with notepad.
This is the most important part of the process. In the snapvol.cfg you will be configuring the user profile by excluding files and folders you do not want to be written to the writable volume.
To exclude files and folders scroll down to the File system exclusions and start excluding items by using “exclude_uwv_file=\<location>”.
I’ve added a couple of folders as an example.
When you have configured the snapvol.cfg, save the file and follow the steps below to add the new template to the App Volumes Manager, create a new writable volume and test it by logging in.
- In vCenter select the VM where you added the template as an extra disk and edit the machine settings.
- Remove the disk and click OK to reconfigure the machine.
- The writable volume template is now unlocked and ready to be copied to the App Volumes template directory.
- Browse the datastore, selected the created template and copy it to Datastore\cloudvolumes\writable_templates.
- Login to the App Volumes Manager and click Volumes > Writables > Create.
- Type a username, select the user and choose your newly created template.

After you created the writable volume for the user. Login to a virtual machine with an App Volumes Agent and wait for the logon process to complete.
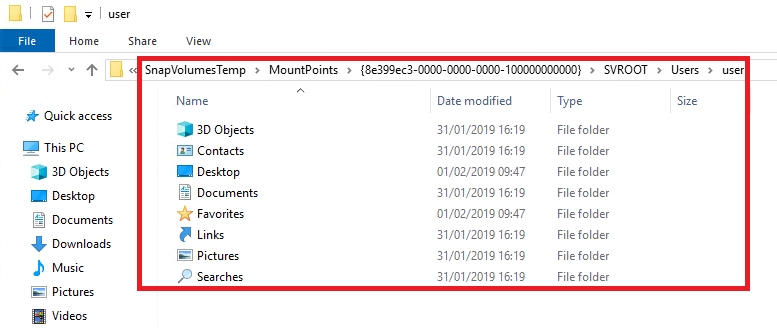
When you’re logged in, open the windows explorer and browse to C:\SnapVolumesTemp\MountPoints\{GUID}\SVROOT\USERS\<Username>. As you can see in the print screen below, the folders I excluded in the snapvol.cfg are not listed and won’t be saved on the writable volume.
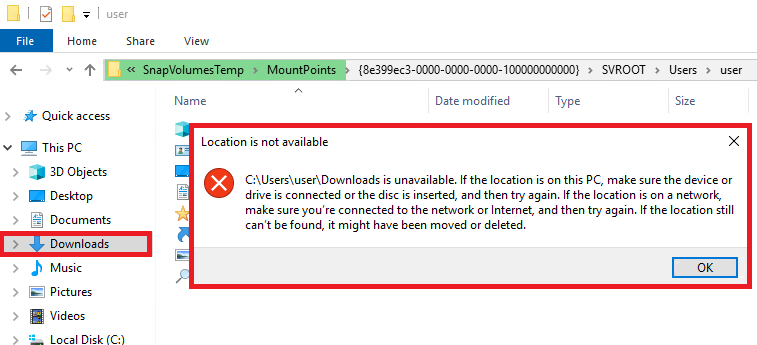
I excluded the downloads folder from being written to the writable volume. When I now select the downloads folder from the left pane, I receive the error message that the folder is unavailable. This is something I recommend hiding from the windows explorer to prevent unnessecairy calls to the helpdesk ;-).
Conclusion
If you are using VMware App Volumes and you are struggling with roaming profiles and/or folder redirection, this writable volume is definitive something you should look into to get more grip on your user profiles.
Be aware that the snapvol.cfg is the main configuration item for your writable volume, so always create a copy of the template.vdmk before editing the file.
If you have any questions, feel free to contact me.


Je moet ingelogd zijn om een reactie te plaatsen.